If you have a lot of products in your store, a faceted search can help customers find what they’re looking for much faster and easier. The app implements the faceted search via the Filters feature. This feature allows you to display and apply various product filters on the search results or collection page.
You can view and adjust Filters in the Smart Search Bar & Filters control panel > Filters > Filter list section.
 | Learn what is a faceted search (faceted navigation), how it works, and the top benefits and best practices of this feature for e-commerce. |
Adding Filters
There are ready-made filters with the most common product attributes like price, vendor, availability, collection, etc. You can create as many filters as you would like:
- Filters by variant options
- Filters by metafields
- Filters by tag prefixes
- Custom filters
- Filter by locations
Hiding Filters
You can find the instructions on how to hide filters here.
You can also hide particular filter values. To do so:
- Go to the Smart Search Bar & Filters > Filters > Filter list section > General tab.
- Click the Manage filter / Manage custom filter link in the filter row whose values you want to rename.
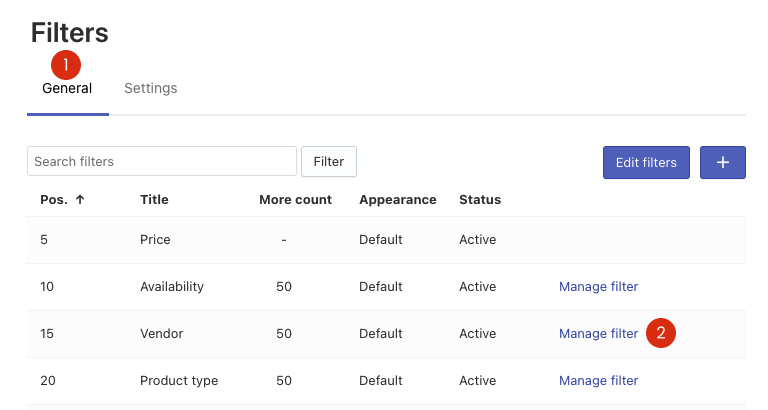
The list of filter values will be opened.
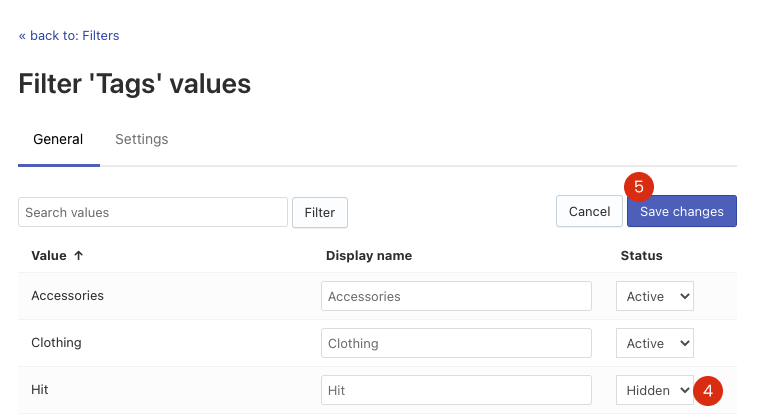
- Click the Edit values button in the top-right corner.
- Change the status of value(s) you want to hide from Active to Hidden.
- Save the changes.
Renaming Filters
You can edit the titles of filters as well as the names of filter values.
To edit the titles of filters, follow these steps:
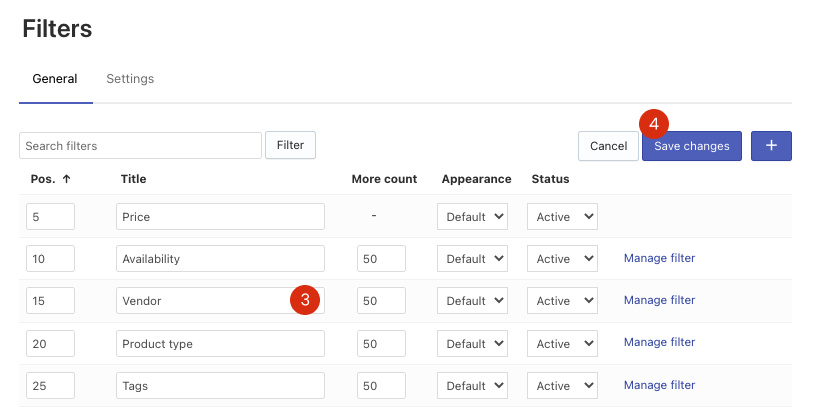
- Go to the Smart Search & Filter Bar control panel > Filters > Filter list section > General tab.
- Click the Edit filters button in the top-right corner.
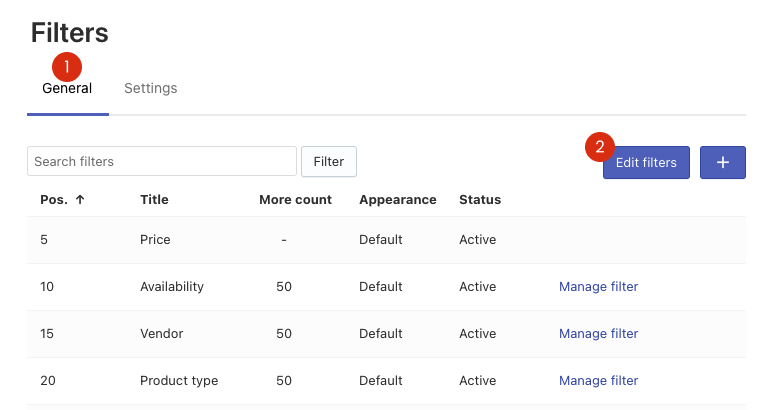
- Edit the title(s) in the Title column.
- Save the changes.
That’s it. You can now go to the storefront if you’d like to ensure the filters’ titles are up-to-date.
To edit the names of filter values, follow these steps:
- Go to the Smart Search & Filter Bar control panel > Filters > Filter list section > General tab.
- Click the Manage filter / Manage custom filter link in the filter row whose values you want to rename.
The list of filter values will be opened.
- Click the Edit values button in the top-right corner.
- Edit the name(s) in the Display name column.
- Save the changes.

Changing Filters’ values appearance
You can choose the appearance of filter values in the Appearance option:
- Default – values as text
- Color – color values as color swatches
- Size – size values as text in frames
There are two ways to change appearance.
Way 1:
- Go to the Smart Search Bar & Filters control panel > Filters > Filter list section > General tab.
- Click the Edit filters button in the top-right corner.
- Select the look for the necessary filters in the Appearance option.
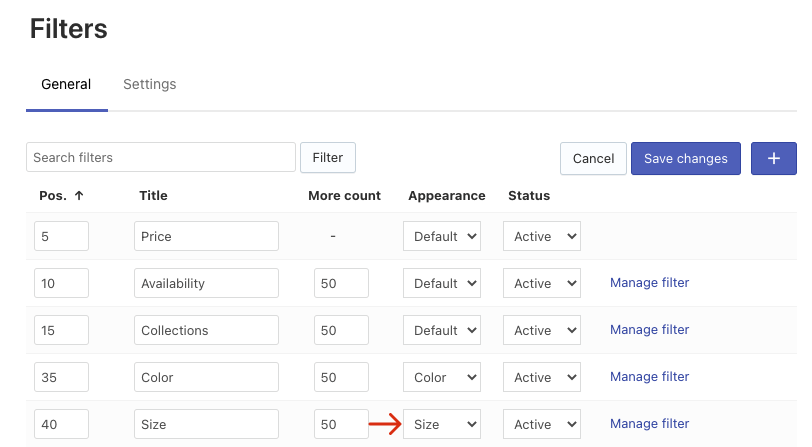
- Save the changes.
Way 2:
- Go to the Smart Search Bar & Filters control panel > Filters > Filter list section > General tab.
- Click the Manage filter / Manage custom filter link next to the filter whose look you want to change. The editing page of the filter will be opened.
- Go to the Settings tab, and select the look in the Appearance option.
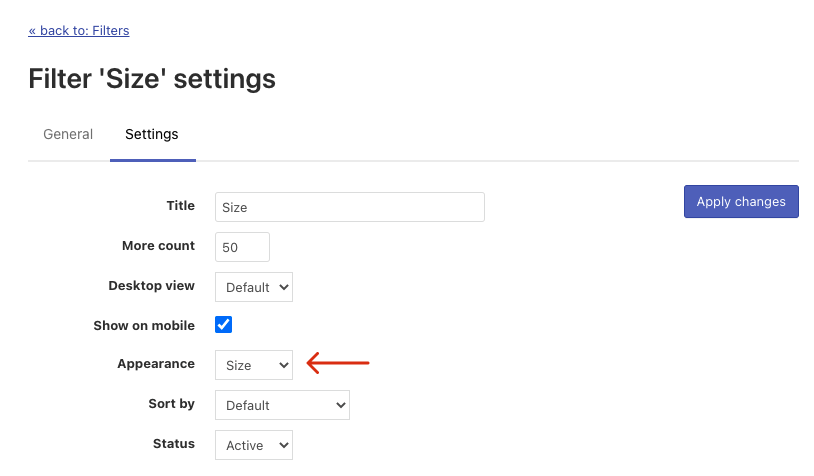
- Apply the changes.
Setting up Color and Size Filters
You can find the instructions for setting up color and size filters here.
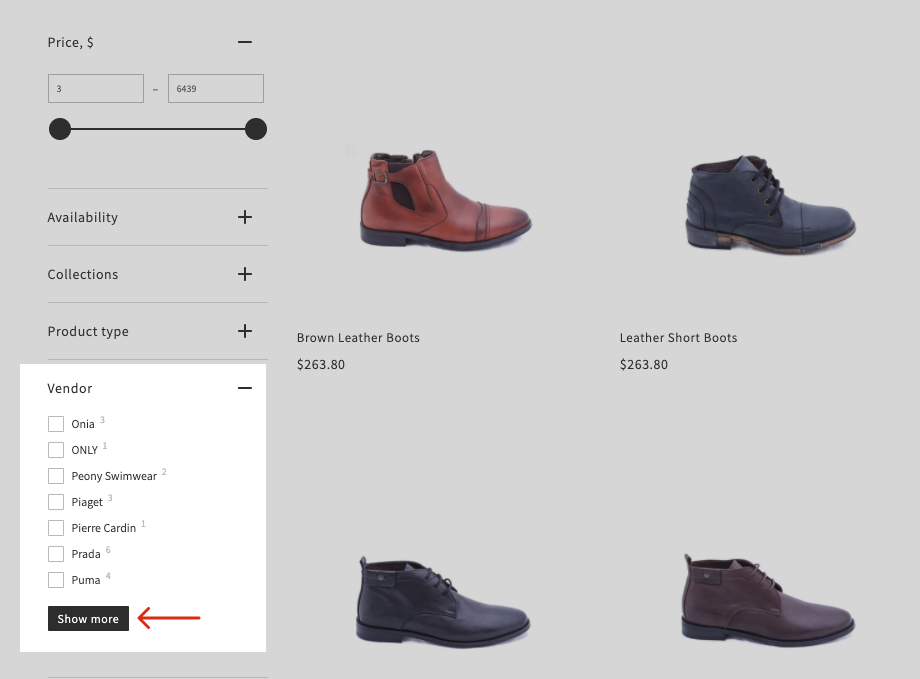
Managing the number of visible values
You can set the number of filter values visible on the filters’ left-hand side. If the actual number of filter values exceeds this number, the Show more button will be displayed.
To manage the number of filter values, follow these steps:
- Go to the Smart Search Bar & Filters control panel > Filters > Filter list section > General tab.
- Click the Edit filters button in the top-right corner.
- Set the number of values displayed by default in the More count option.
 Note
NoteIf you set More count to 0, all filter values will be displayed in the sidebar.
- Save the changes.
Sorting Filters
You can find the instructions on sorting filters and their values here.
Bulk editing Filters and Filter Values
You can find the instructions on bulk editing filters and their values here.
